I started teaching high school in a quaint town in Missouri about 35 miles south west of St. Louis in Fall of 2010. What a journey it has been! I have learned so much and the more I learn about being a teacher the more I find I have to learn! The kids are inspiring and heartbreaking, stubborn and exciting. It was rewarding and humbling at the same time. I am so blessed!
Here are a few things we studied this fall: (in reverse order)
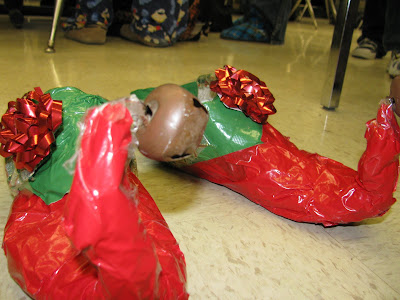
DUCT TAPE UTILITARIAN ART
I had one week left in the semester, but wanted to end it with a bang. I ordered a bunch of colored duct tape and introduced form to my students. We talked about utilitarian art as one of the earliest forms of art. They were challenged to create a utilitarian object that has three-dimensional form and a colorful graphic-entirely out of duct tape! Students did some research in the computer lab to find templates, step-by-step instructions for their ideas, and images of objects they wanted to make. They did NOT disappoint! I got all kinds of creative things!


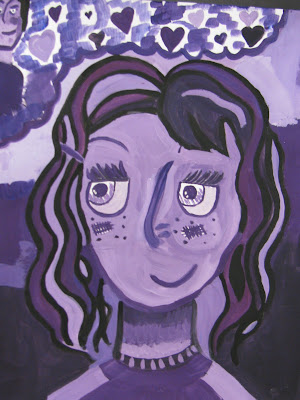
MANGA SELF PORTRAITS
Manga is a style of graphic narrative that originated in Japan, but has become popular in the United States and now originates here too. Students were inspired by the style and used it in their self portraits. They applied large emotional eyes, small noses and simplified mouths. Artists also thought about mood in art and attempted to apply this to their portrait through facial expression and color. This was a very popular project this semester, even with the students that thought that Manga was sort of dumb when the project started. “Mrs. Steinlage! I was just doodling Manga on my paper in my last hour and everyone thought I was so cool because I could actually draw it! Thank you so much for teaching me this!” ,One student commented to me during the project. (Made my heart melt! That’s why I got into this career!)


GULF DISASTER TESSELLATIONS (thanks to Ryan Snider for the skeleton of this lesson)
Students did research on the gulf disaster in the library to begin this project. They looked at news stories on youtube.com, articles on nationalgeographic.com, and searched for images that photographers had taken of the BP gulf oil disaster of 2010. Once they learned a little bit about this catastrophic event, they were challenged to think about the impact on the gulf coast. We discussed the economic impact, the impact on animals and plants, and about the rescue & relief efforts by watching an episode of Billy the Exterminator “Billy Does the Gulf” (A&E channel, August 2010). Then they learned about imagery and how we can take ideas and turn them into images. They learned about symmetry through the process. Students created a design using the gulf disaster imagery they chose around the edges of a 4.5”x4.5” piece of paper using ebony or 6B pencil. They folded a 18”x18” piece of drawing paper to create a grid of 12 squares. They transferred the 4.5”x4.5” square to the larger piece by creating a rubbing mono print (turn the paper over and rub). They continued this process by folding and rubbing onto neighboring squares until they had a full paper of repeating, rhythmic, symmetrical design. I challenged them to use only complementary colors to complete the drawing and they had to crosshatch the two colors together someplace in the composition (throwing in some color theory and colored pencil technique in there too!)


CHAOS & ORDER CITIES
We learned linear perspective with this project. GLE’s call for just one point perspective, which I prefer to begin with since it is less confusing for first year art students. But rather than creating a boring city scene, students were challenged with incorporating elements of both chaos and order. In their journals, students looked for news articles that represented the chaos or order in the world and wrote about it. They reflected on the chaotic events of their lives and thought about what held order in their routines. All of this helped them prepare for the theme of their composition.


COLOR MIXING SHAPES
I threw this lesson in last minute because I wanted the students to have a small background with color before they moved on to the Chaos and Order City. They created a color wheel from scratch using protractors (yay! Math cross-curricular!) Then they filled in the color with watercolor (next time I will use tempera, but my order wasn’t in yet, so we used what we had). Students got extra credit if they created a tint (using water) and a shade using black incorporated into their design. Also, I did not want them to use boring circular shapes. I challenged them to come up with something more free form or interesting than the boring circle. They rose to the occasion!


LINE VARIETY-HIDDEN IMAGES & EXPRESSIVE LINE (no photos) (credits to Abigail Birhanu for this lesson)
Students explored line variety and the meaning line can express in artworks through first using as many lines types as they could in an abstract design. Then, they applied this same technique to hide a Dürer reproduction in a new environment. They used only ebony pencil and/or sharpie and must include an entire value range, so they were learning line for value, as well.
GLUE AS LINE (no photos)
We started out with line. First we studied contour line and I did an easy project to ease them into the procedures in the art classroom and accustom them to my classroom rules. Glue was mixed with acrylic paint and students flowed it out of the bottle to create natural thick-thin & lost and found contour lines. I used live flowers for them to copy. They had the choice to create realistic type drawings or more graphic/abstract options. Then they colorized them with chalk pastel or watercolor. (This is actually an elementary project, but look at how awesome they turned out!!)
No comments:
Post a Comment